Watercolor Watermelon painting is a great idea to start learning watercolors!
You can paint them on a student quality cellulose paper as well as on professional 100% cotton paper, you don’t need a whole range of colors, a limited palette will work just fine, and you don’t need to be a pro to create juicy and colorful watermelons.
Let’s start with the materials.
Paper:
- As mentioned earlier, you can use a simple cellulose paper for this painting. However to achieve those soft edges of your layers and nice transitions of tones you would need 100% cotton. We will use a lot of wet-on-wet techniques today and cotton paper works the best for it. We used Canson L’Aquarelle Heritage (100% cotton) for this tutorial.
- Texture should be cold pressed (middle grain) to achieve those typical for watermelon textures. You can also use rough texture to stand out even more!
- Size of your paper sheet can be anywhere from A4 (21 × 29.7 cm or 8.27 × 11.69 in) and up. With wet techniques you want to feel free using wide strokes, so the bigger paper sheet the better (and easier).
Paint:
- Any good quality watercolor set will do. I used “Rosa” (first Ukrainian professional watercolor brand). You won’t need many colors, most red (maybe warm variations of pink), some greens and blues. This $20 Winsor Newton kit will work just fine.
Brushes:
- You will need a relatively big (size #4-#6) natural brush. I used a brush with squirrel hair, it has the softest bristles out of all natural brushes. If you want to invest you can get this Princeton #4 Squirrel brush.
- I also used a smaller natural brush (size #2) for more delicate lines, but you can just use a synthetic brush for that part.
- Prepare a couple of small synthetic brushes for details: watermelon skin and seeds. Size #2-#4 will do.
Other:
- If you plan to sketch before painting, use a soft pencil (B, HB, B2 and up)
- Eraser
- Clean water
- Paper tissues
- Tape to strap your paper sheet and avoid deformations
LIFETIME ACCESS OFFER

Lifetime access to 47 watercolor classes taught by a professional artist.
✅ Full library access, 47 classes
✅ Beginner to Advanced crash course
✅ All our ads-free YouTube videos
✅ Private Facebook group
✅ Real Teacher Feedback
✅ Optional Coaching Sessions

Tutorial
Sketch:
In my opinion pencil sketch for this painting is optional. Since we will use lots of wet techniques you won’t be able to fully control the paint and fill in your sketch precisely.
So you might want to outline the composition with a pencil: arrange each watermelon slice location on paper so that they all look harmonious.
Here is a photo reference for your painting:

Hint:
To make this sketch fast and easy, draw a massive circle which will be the main area, all watermelons have to fit inside it.
Draw triangles inside the circle, those will be your slices.
It doesn’t matter how perfect the slices are, the most important is a composition – your watermelons are in a center, nothing is falling out of the circle, nothing is leaning towards right/left side, or falling out of the frame (placed too low or to high up on the paper sheet).
Make sure your pencil sketch is thin and light, you don’t want to have dark lines coming through your watercolor layers. Remember, watercolor is transparent, right?

Follow our tutorial and paint amazing watercolor painting you’d be proud to hang on the wall
Total Time: 1 hour and 20 minutes
Step 1
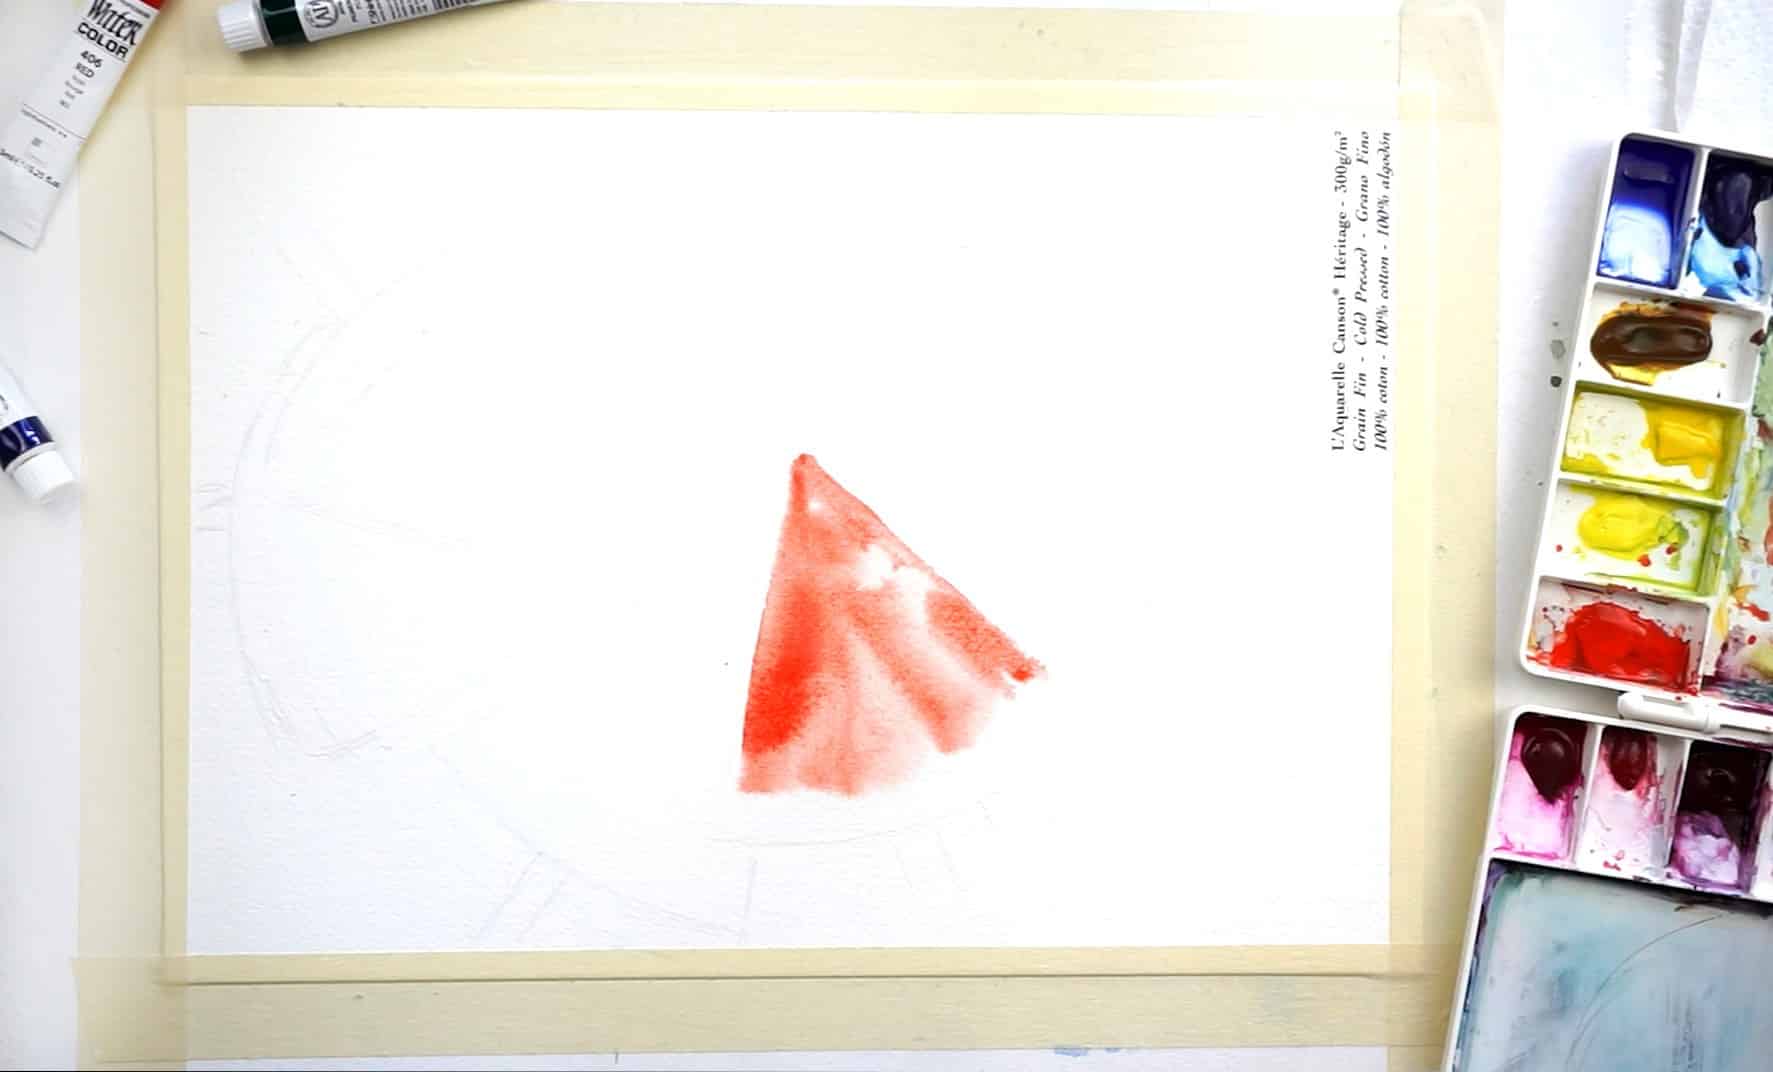
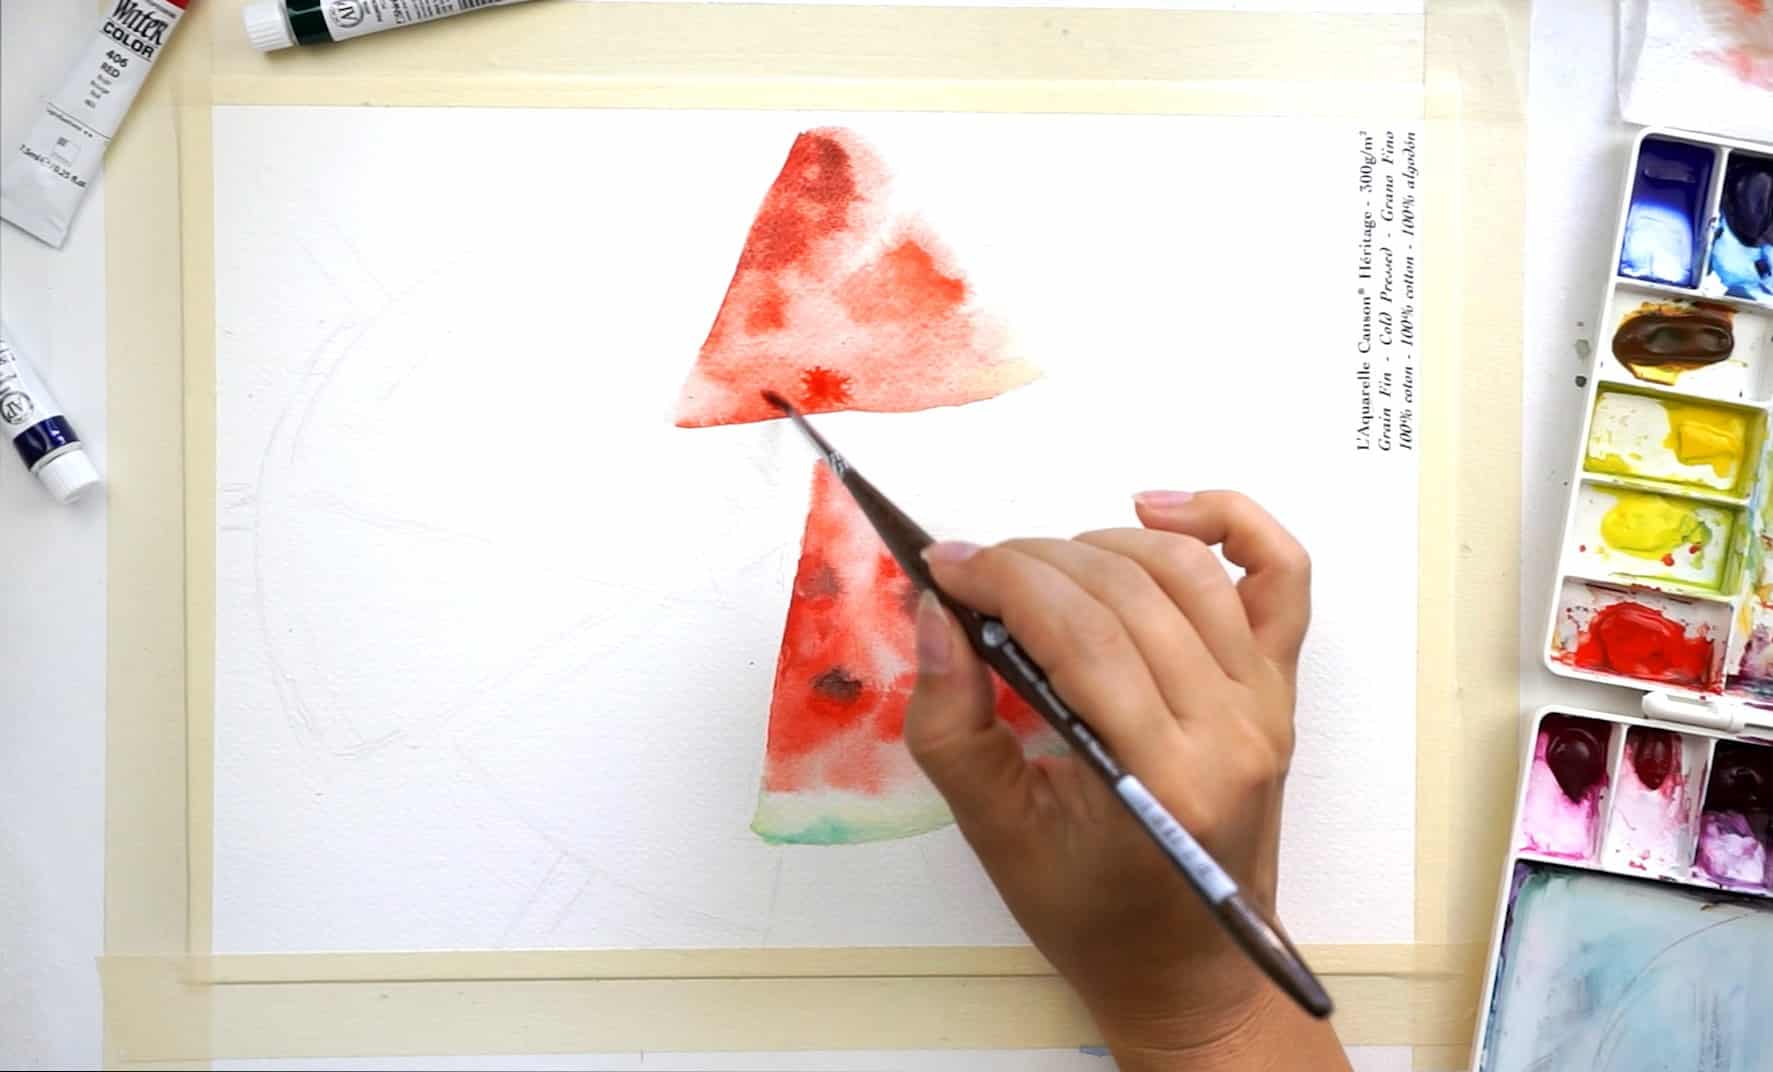
Pick one slice (I chose the bottom one) and apply clean water within the slice-triangle with a big round natural brush.
We need it to prepare the paper sheet for wet-on-wet technique.
Then pick warm red color (I used “Cadmium Red Light”), and apply it on that wet area. No need to cover the triangle with one plain red color, leave some areas less covered with pain (maybe even allow white paper to shine through) and on the other hand apply more concentrated red in some part of that slice. So you will get uneven coverage like on an image below.
Step 2
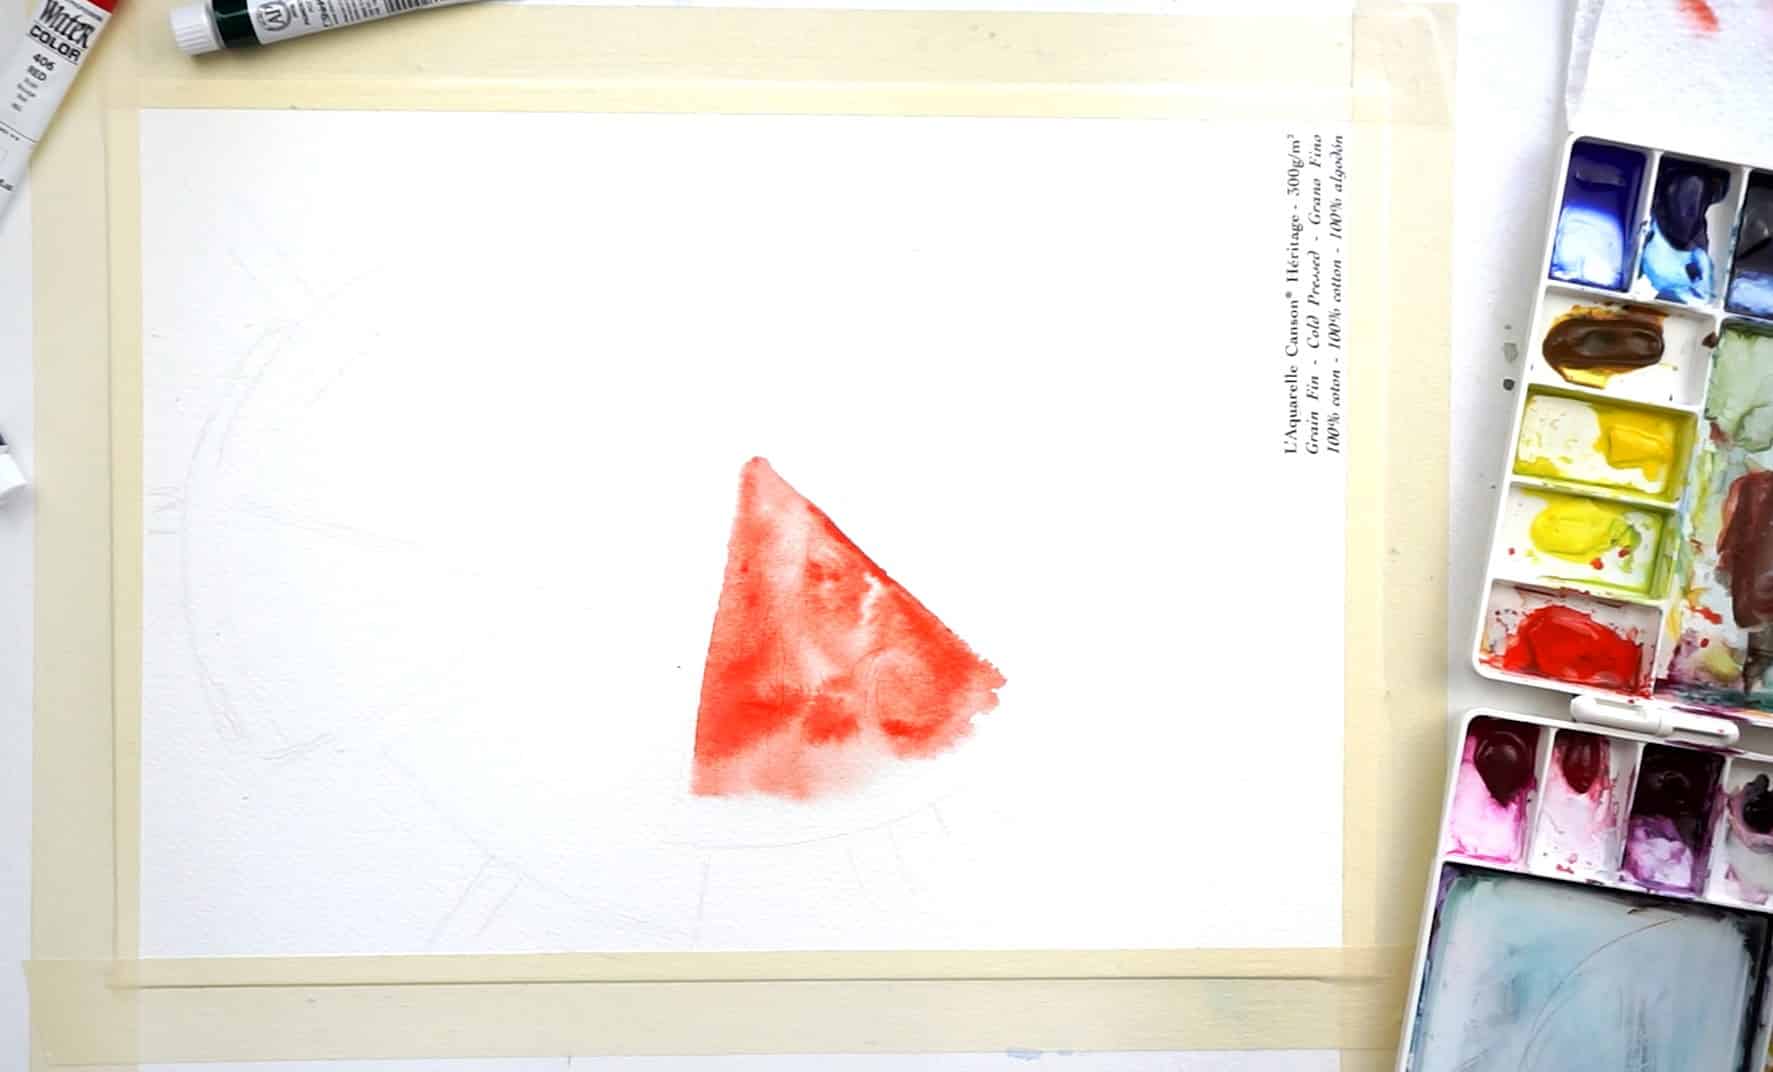
Since we used lots of water for this slice, your paper is still wet and that’s a good thing.
Apply more of concentrated red paint on a slice in a random way to recreate the texture of watermelon.
Somewhere brighter, somewhere less bright, also right side of the slice can be a bit more concentrated at this point than the left one.
Step 3
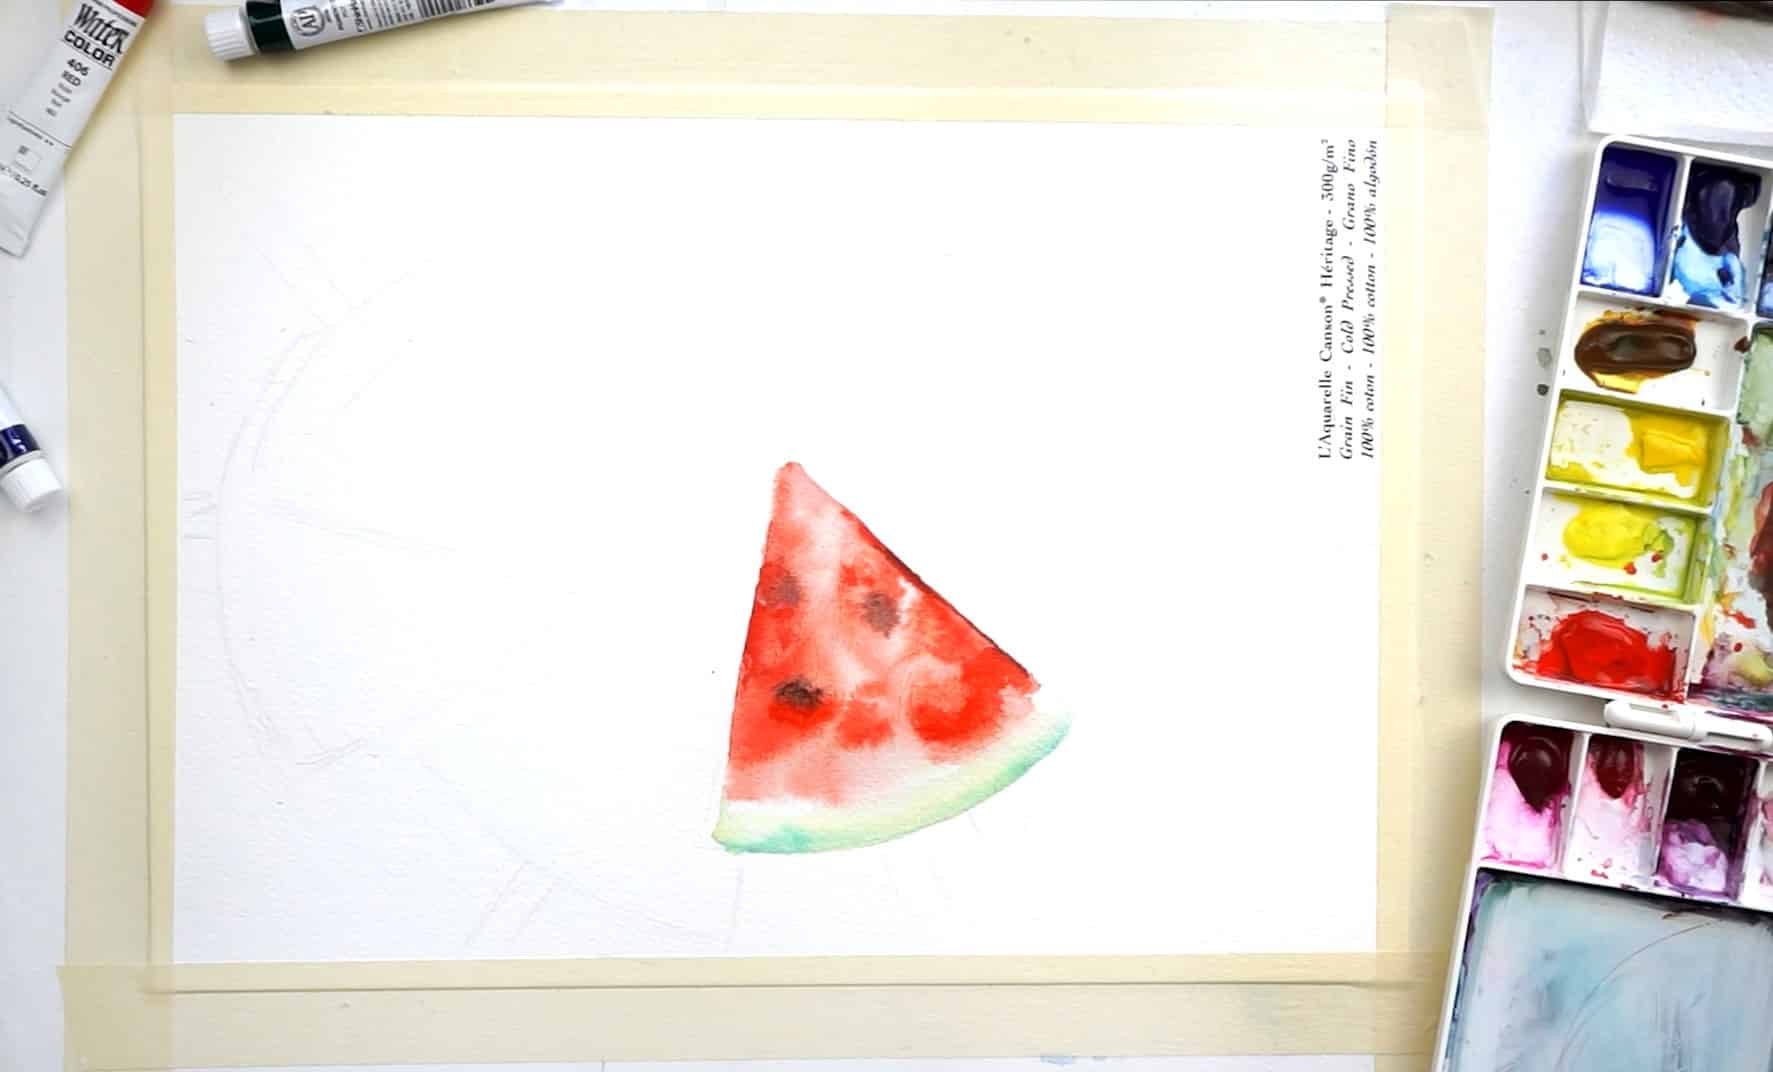
Before painting watermelon crust, carefully apply clean water as a curvy stroke under your slice-triangle with a smaller brush.
Then paint a line with a light green color on the edge of that wet area – green line will blend and flow towards red slice-triangle area (flow but not reach it, there must be blank white space in between).
We want that, all good. We don’t need sharp lines or edges at any point here, everything should be smooth and light.
Darker green (you can add red into green to make it darker according to color mixing rules) follow on the edge of watermelon crust, on top of that first light green.
Also pick up black paint and add oval-like shapes on red slice.
That paint will likely bleed and the edges will smudge. That’s alright! Leave it, we will get back to it later.
Step 4
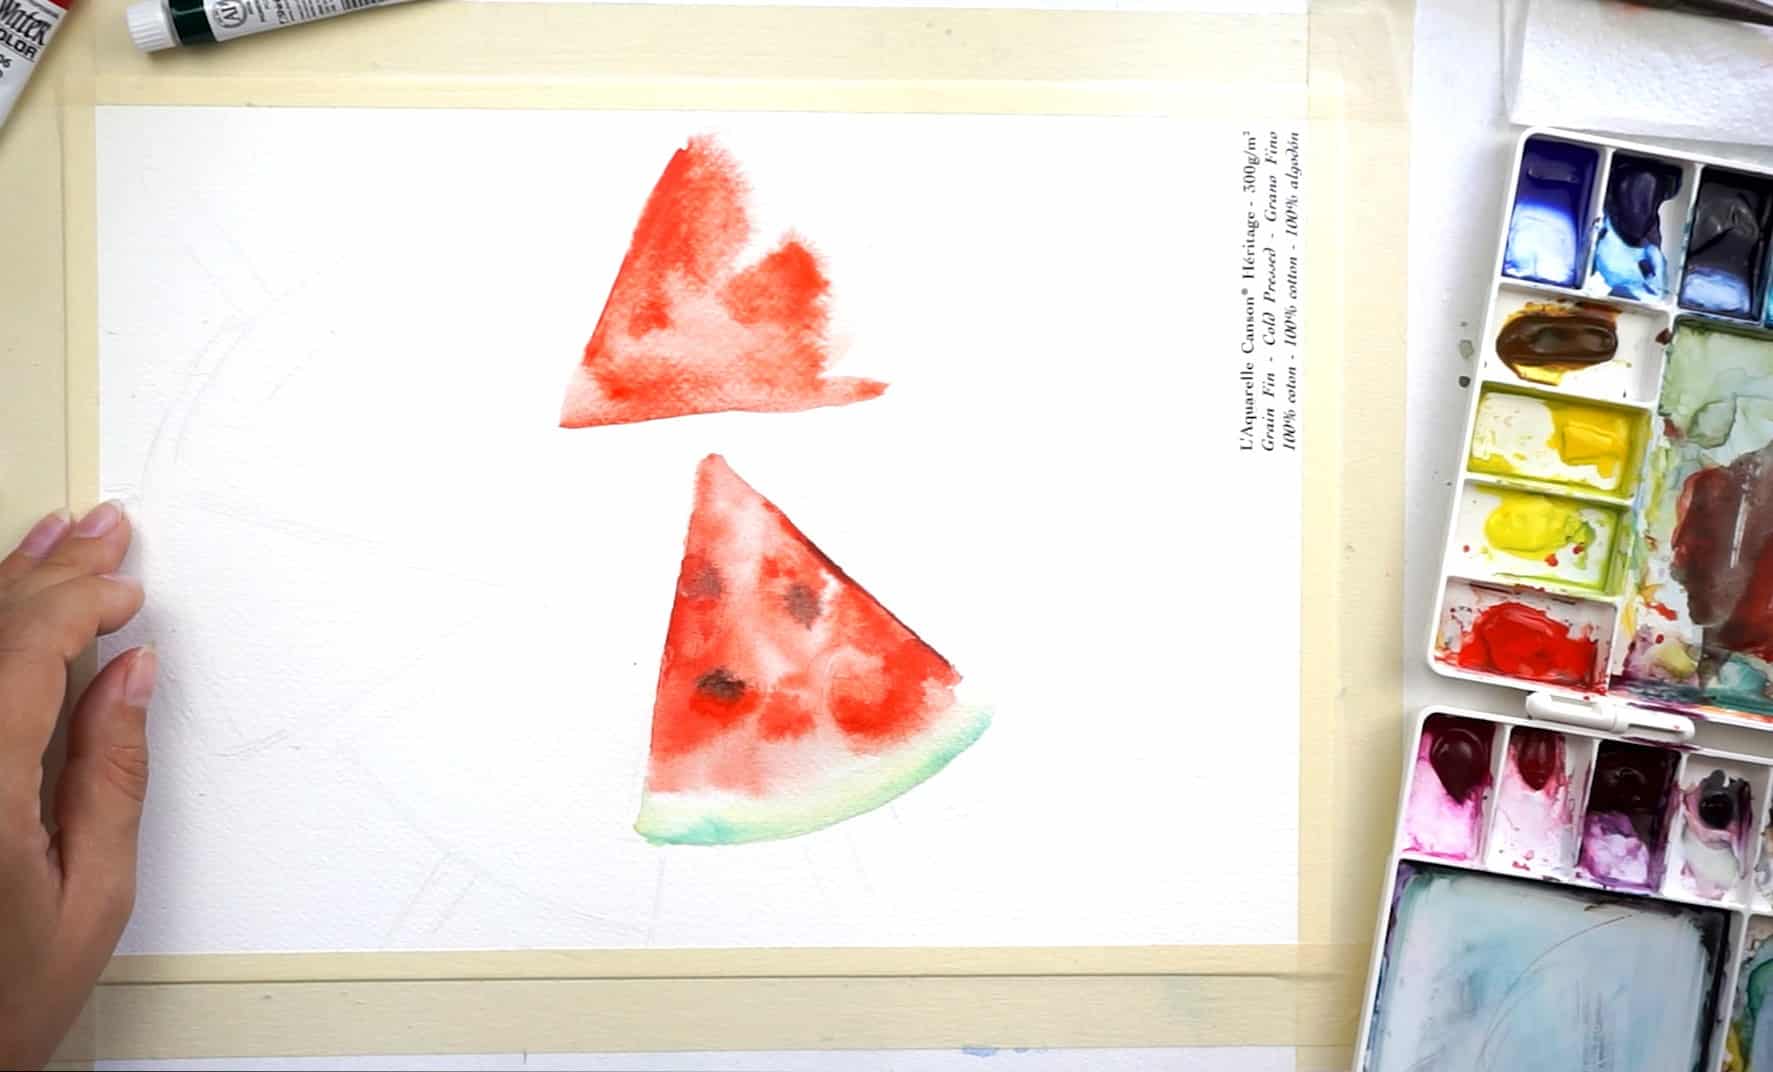
Use the same approach for the next slice: first clean water in the shape of a triangle, then an uneven layer of red paint.
Make sure those two slices are not touching to avoid paint leaking into each other.
Step 5
Take a look at watermelon texture – it has this sort of thin twisted fibers.
Take the smallest synthetic brush, dip it into red paint and paint those curled lines.
Your paper must be still wet from a previous layer application, so these thin lines will bleed into the main background of the slice.
That’s what we need – natural look. However if they bleed completely to the point they disappear, you would need to wait a little bit for paper to get a bit dryer, and try again.
For this trick to work, you need wet paper but not completely soaking wet.
Step 6

Trick: to make those curly lines even thinner than a brush can possibly make, try to use the other side of your brush! Some have a really sharp pointy end which you can use to kinda scrap.
This will leave a super thin trace looking like watermelon fibers! Check how it looks in our full video at the end of this post.
At this stage you can also add blurry black ovals which will soon become watermelon seeds.
For now the ovals just bleed on the slice without sharp visible edges.
Step 7
If your first slice is already completely dry, then pick a relatively dry dark green pigment and paint a line at the edge of the watermelon crust.
This would be the skin which is almost always super dark and sharp.
Step 8

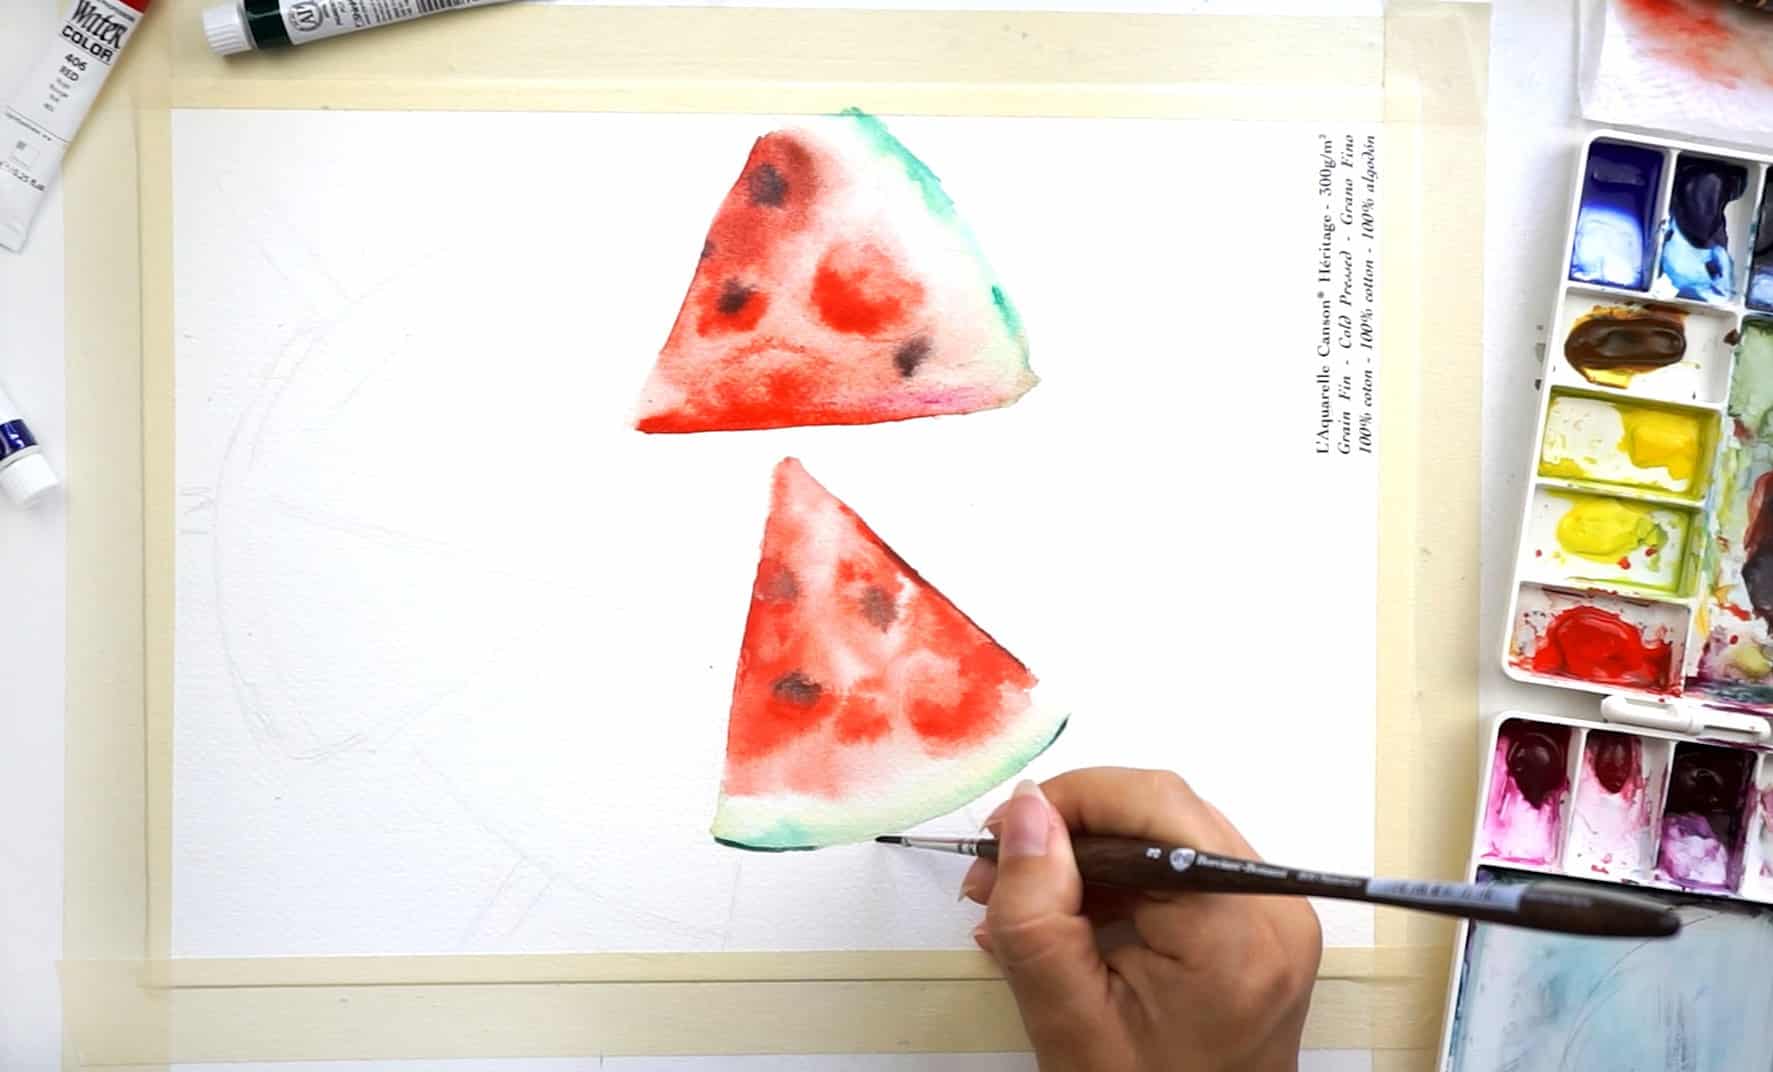
Third slice-triangle should be painted the same way as the previous two: clean water on triangle area first, then red paint unevenly distributed on the triangle.
I repeated the shape of watermelon from the reference, and painted a little notch with a more concentrated red paint.
Bottom side of this slice also has more concentrated color (the slice is rotated to us the way that we see more of the bottom than the top so we need to showcase its volume).
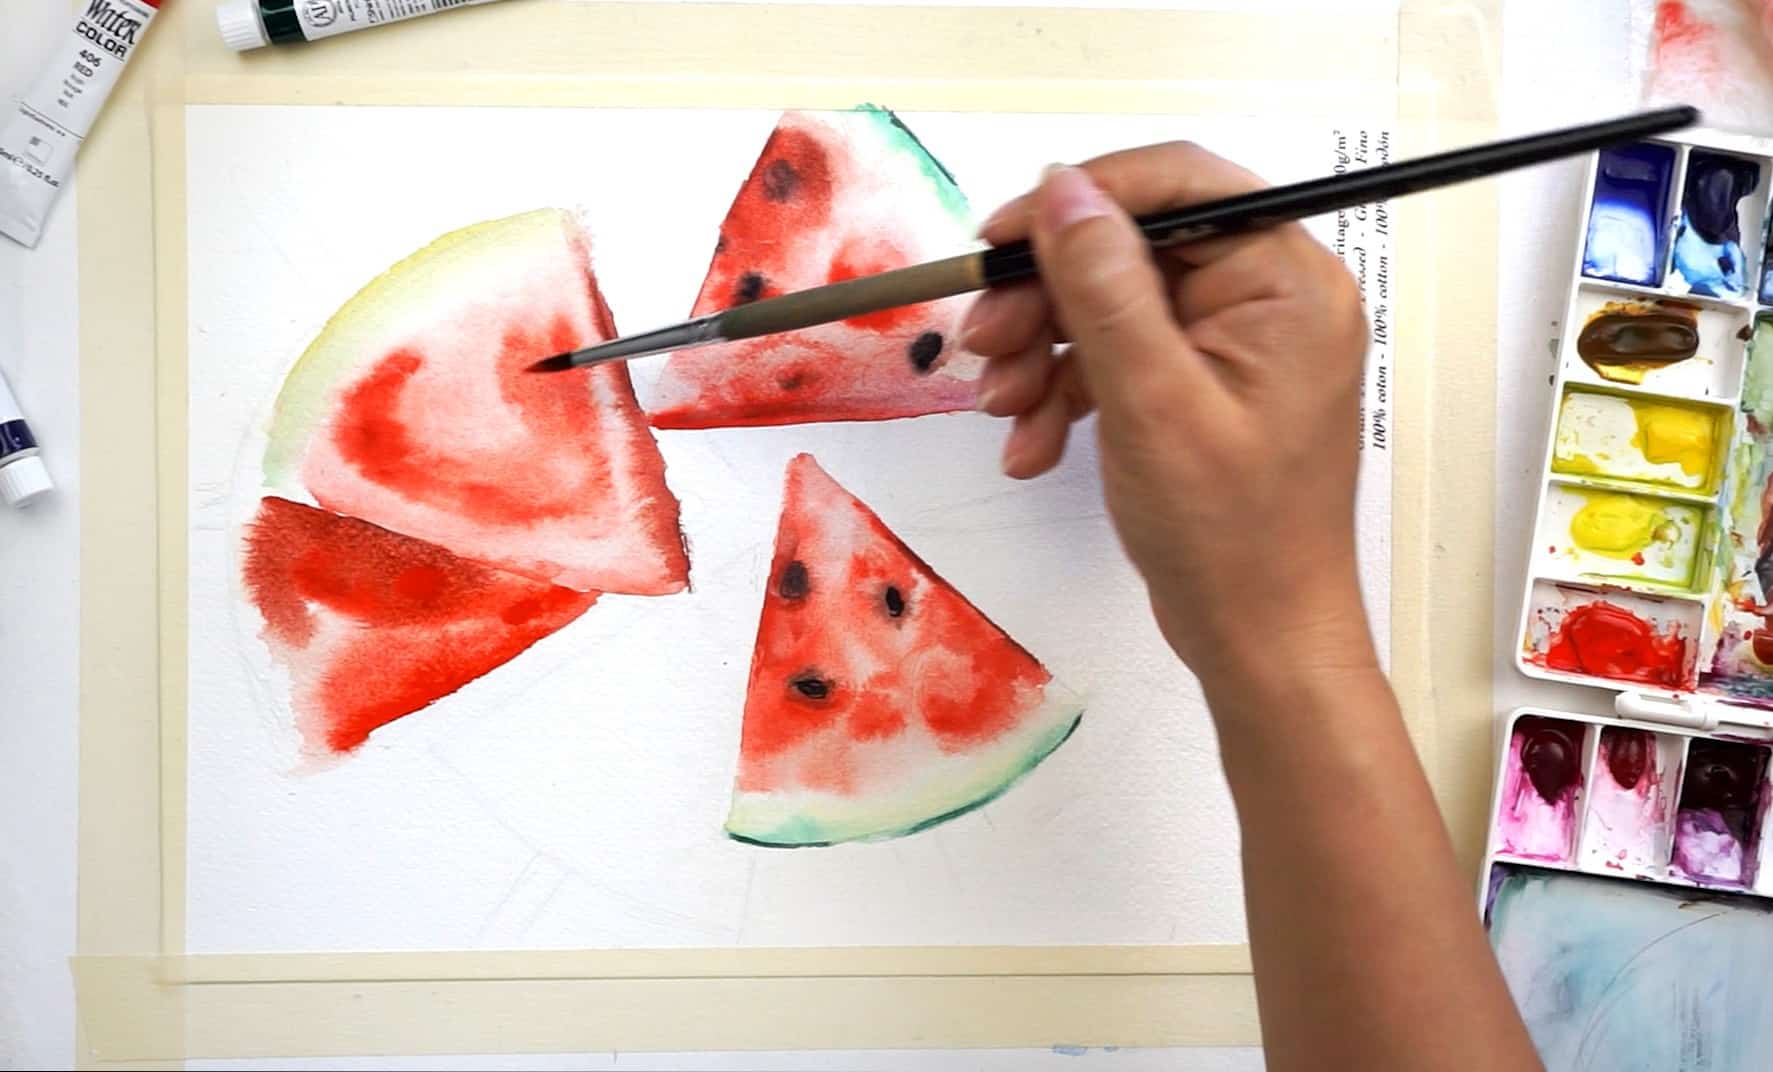
Step 9
This slice has an interesting texture so I decided to repeat it with a smaller synthetic brush and concentrated red pigment.
It looks like the fibers are curling inside the slice following the triangle shape.
Take a closer look at the reference to see what I mean.
Step 10
Paint the skin of this slice, the wat is already familiar for you.
First clean water, then light green layer which flows a little towards the red slice-triangle.
This slice shows more of its right side – paint it with a darker red (to achieve darker red use color mixing rule and add a complementary green paint to red).
Step 11
Time for slices which are underneath the ones we already painted.
Those slices should be much darker than the top ones. You already know how to mix darker red color.
Step 12
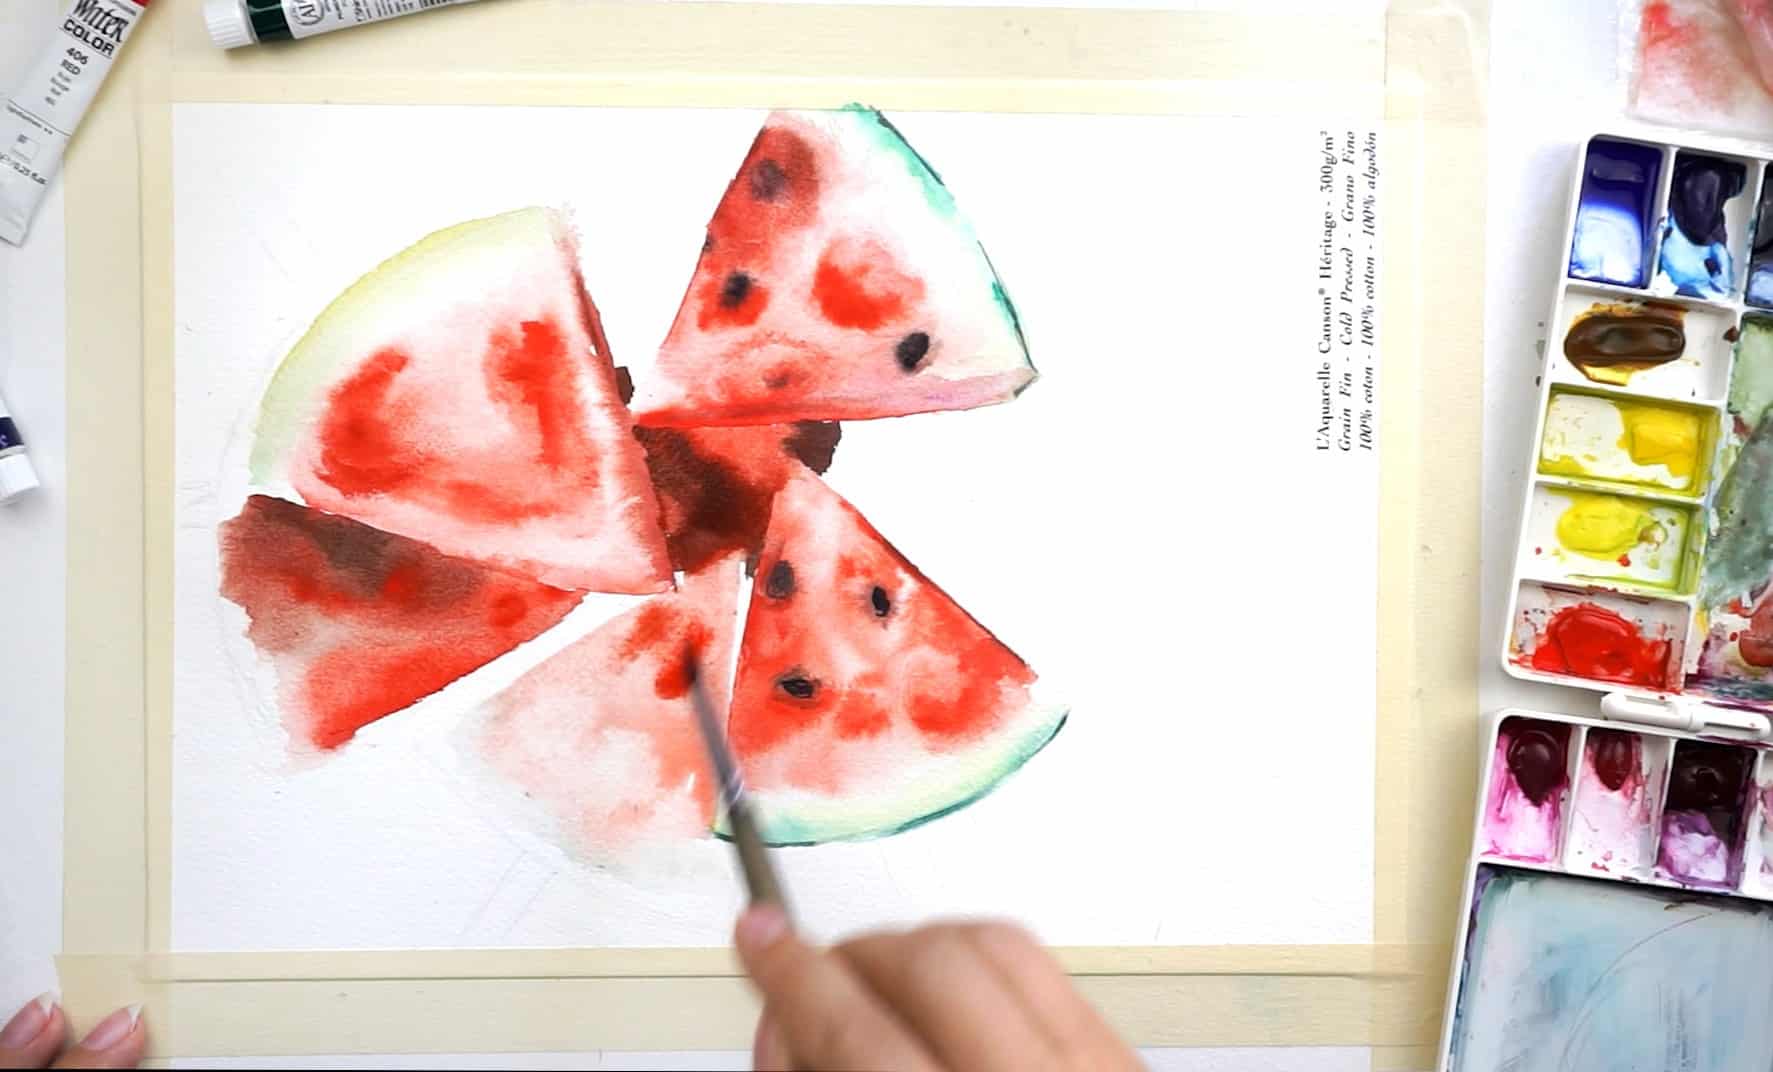
You can mix in a little drop of black into your dark red mix for the shadows.
The shadows are located right under the top slice which naturally casts a shadow on the surface it’s on.
Paint a slice next to it. You know the drill.
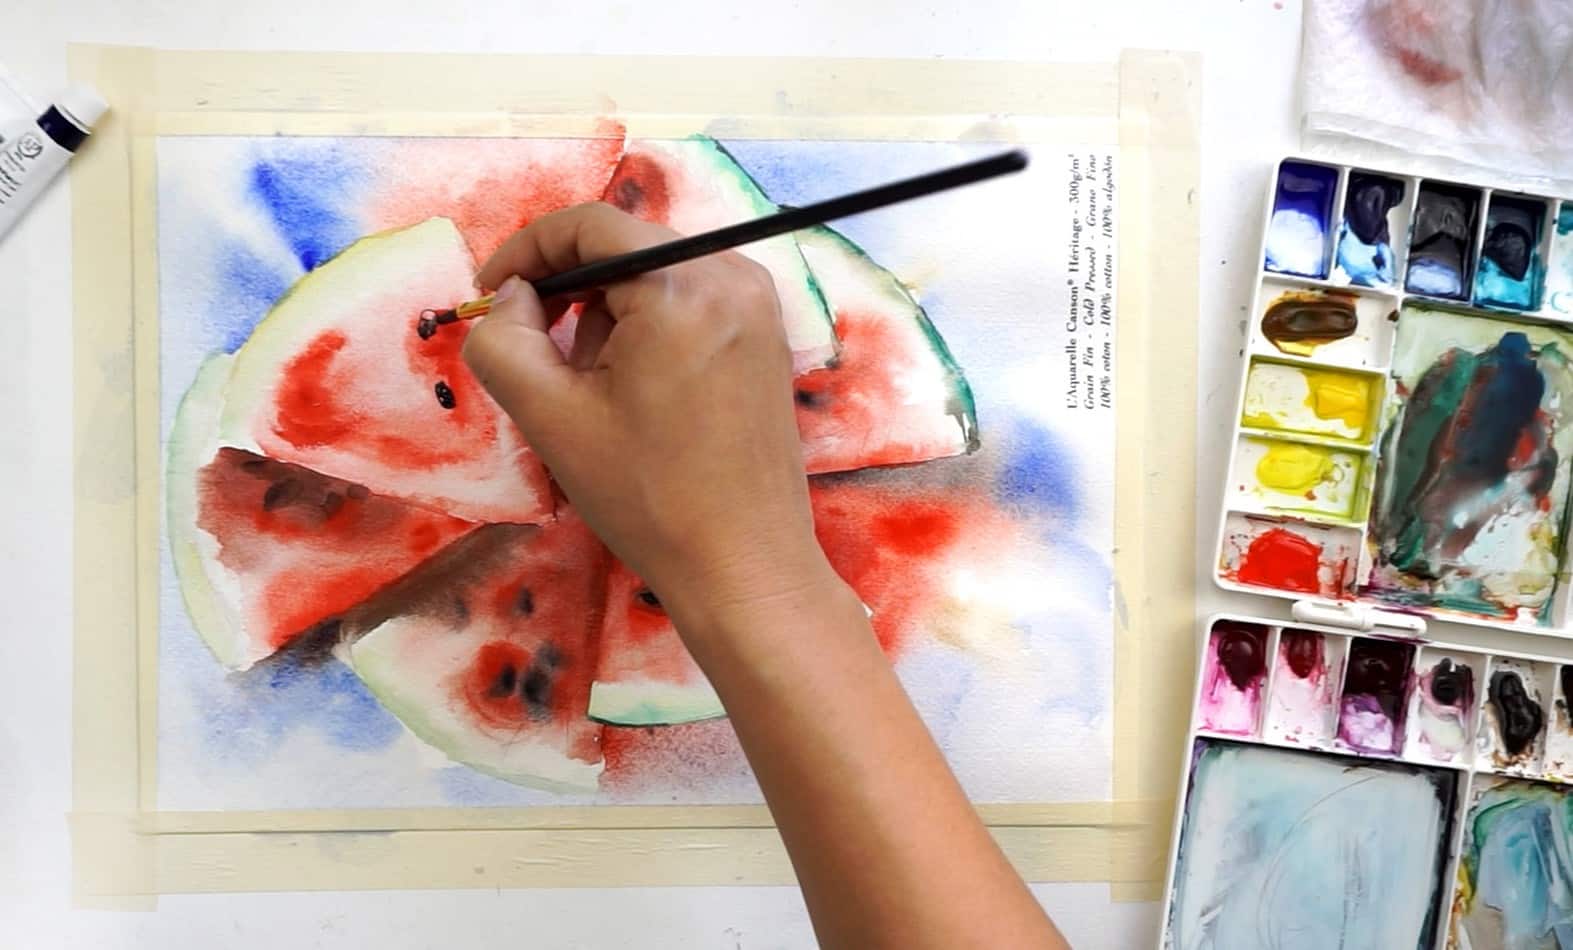
Now, choose slices which are fully dry and paint actual seeds with a small synthetic brush loaded with dry pigment on top of the blurry black(ish) area we’ve prepared before.
Be careful, those seeds are small and delicate.
Step 13
Important to notice that the darkest colors in this painting (except of seeds of course) are in the very bottom which is essentially a table where all this pile of watermelons lie on.
Since they all cast shadow, the table will have to be the darkest in tone.
When filling in the space between two slices with that dark paint, make sure the slices are dry so that dark paint doesn’t bleed into your bright red watermelons.
Add some detailed seeds on slices you’re sure are dry.
Step 14
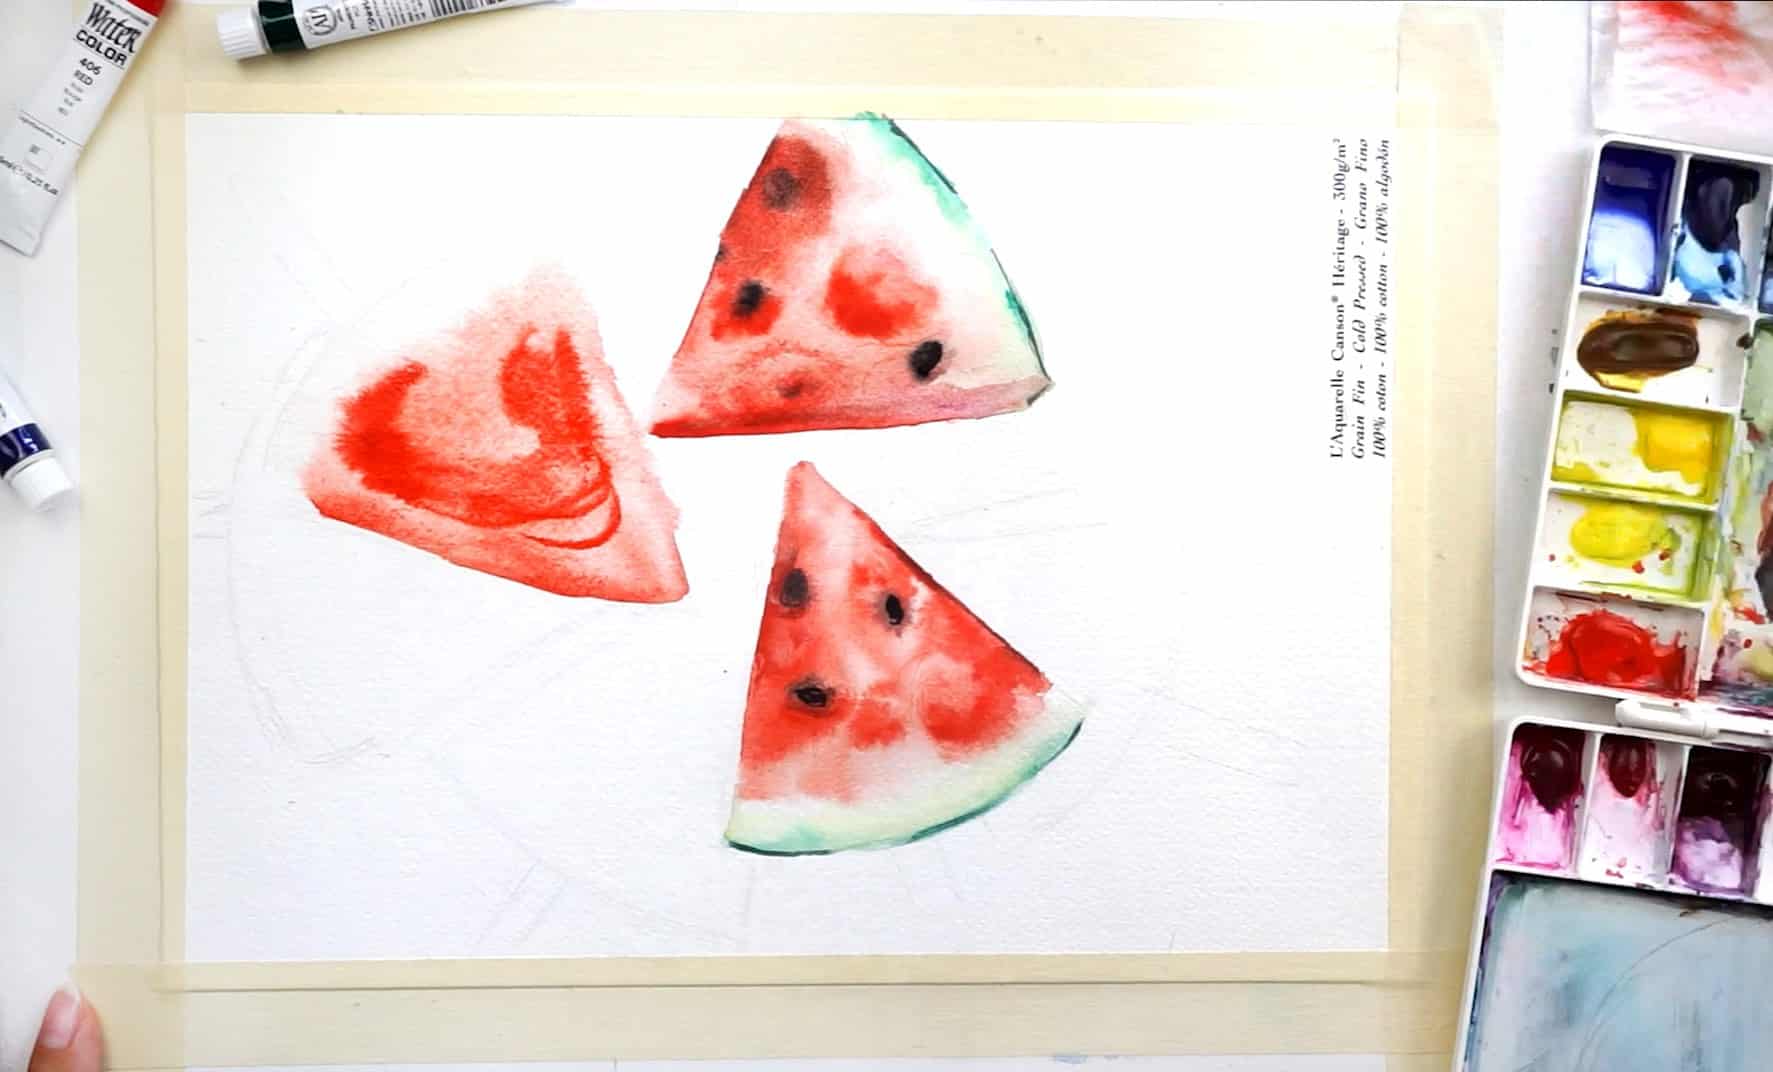
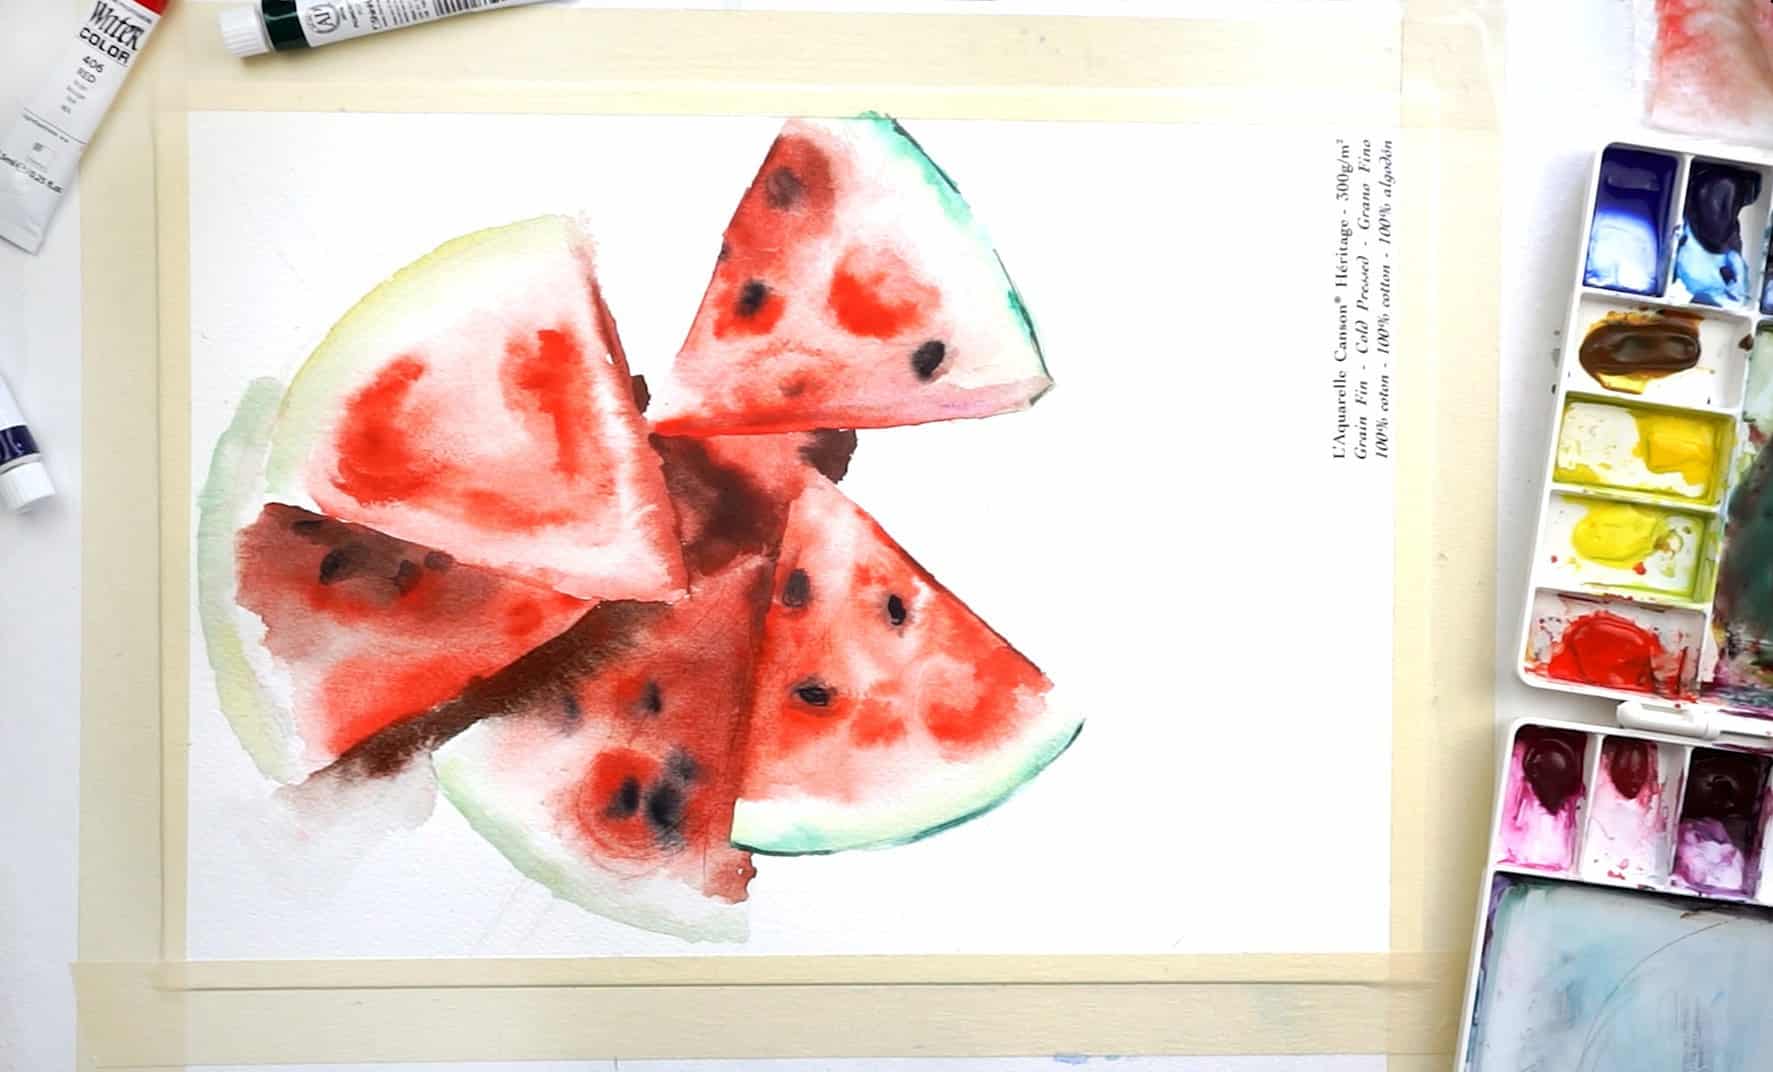
Slices on the right side of the painting must be all dry so you can confidently move to painting another slice which is underneath.
To achieve this easy-looking sugary effect of your slice try to let go and not control the paint flow.
It doesn’t have to be a copy of your photograph, so it’s ok if the paint flows somewhere you didn’t expect.
What you need is an organic look of bursted paint.
Check out that last slice (on the top right) I painted on the photo below.
Step 15
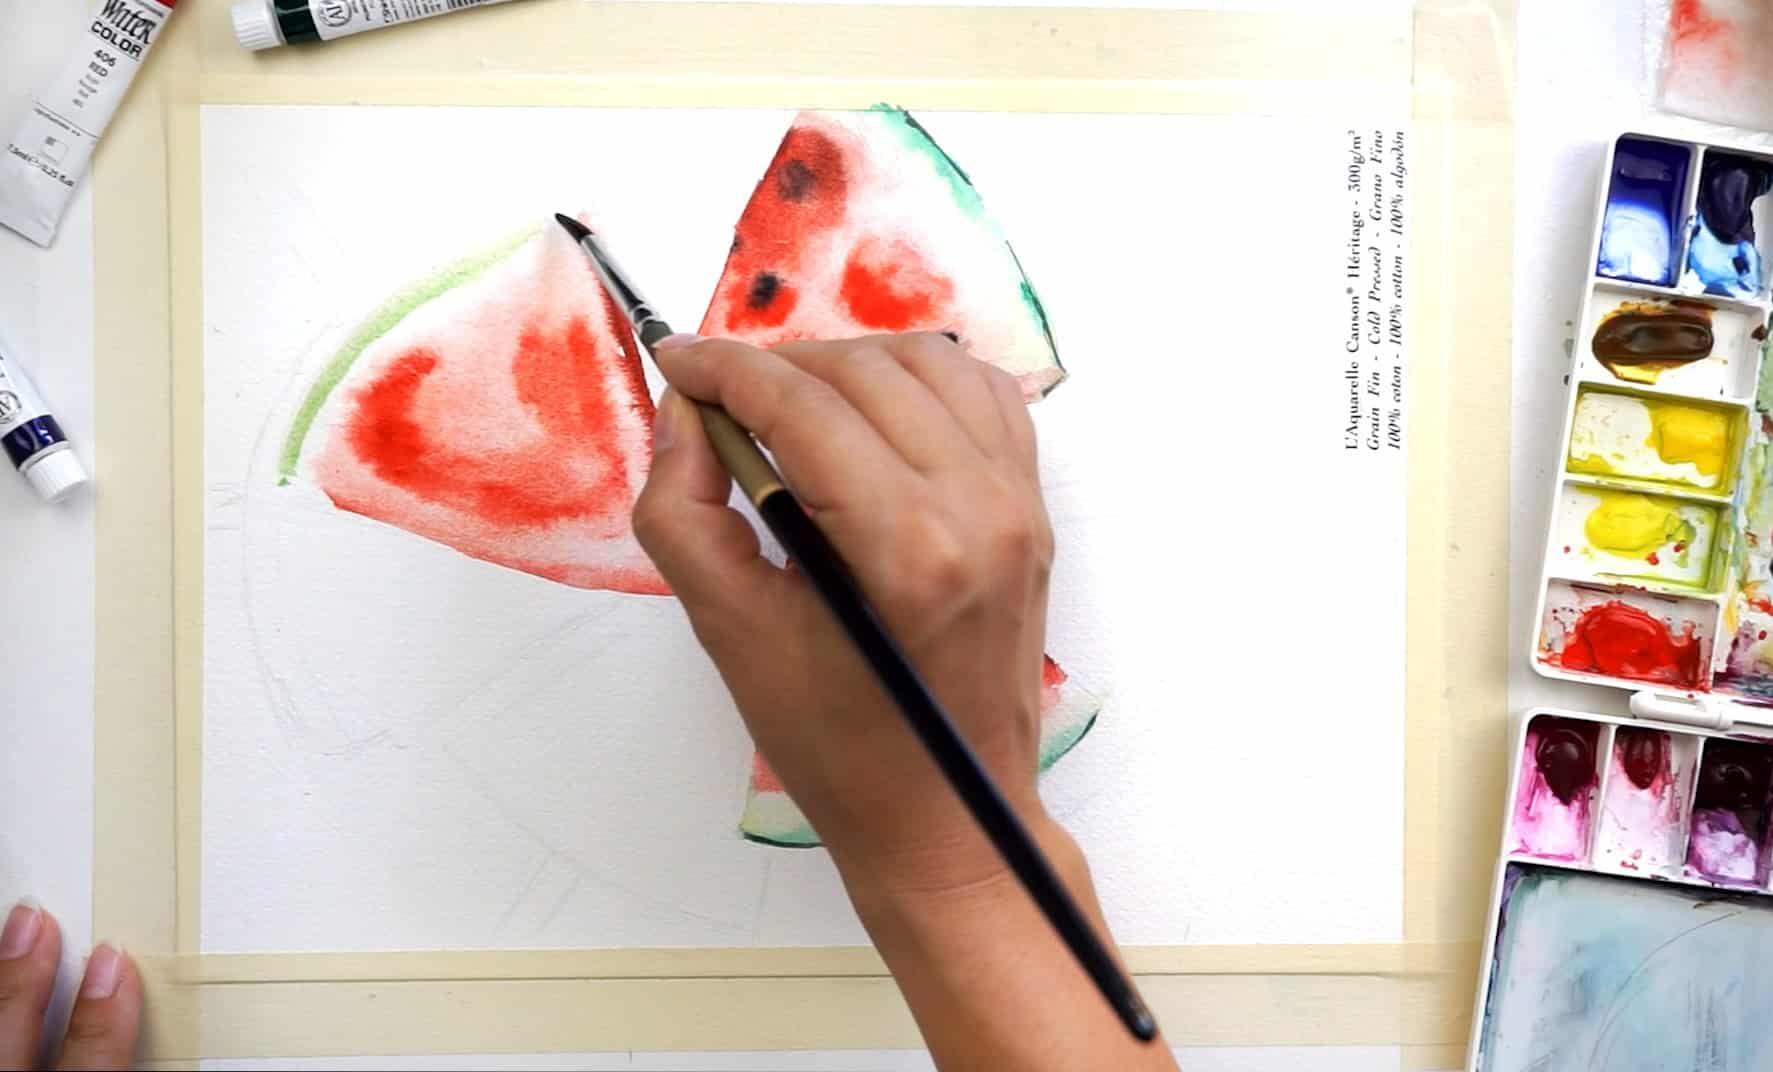
Now, the rest of the slices are going to be even less detailed.
We want to keep focus on the centre of the painting and all those watermelons around it should be less distracting, more blurry.
This is a good opportunity to combine remaining slices and background into one blurry layer.
There will be no visible edge between the background and slices which will give a natural look.
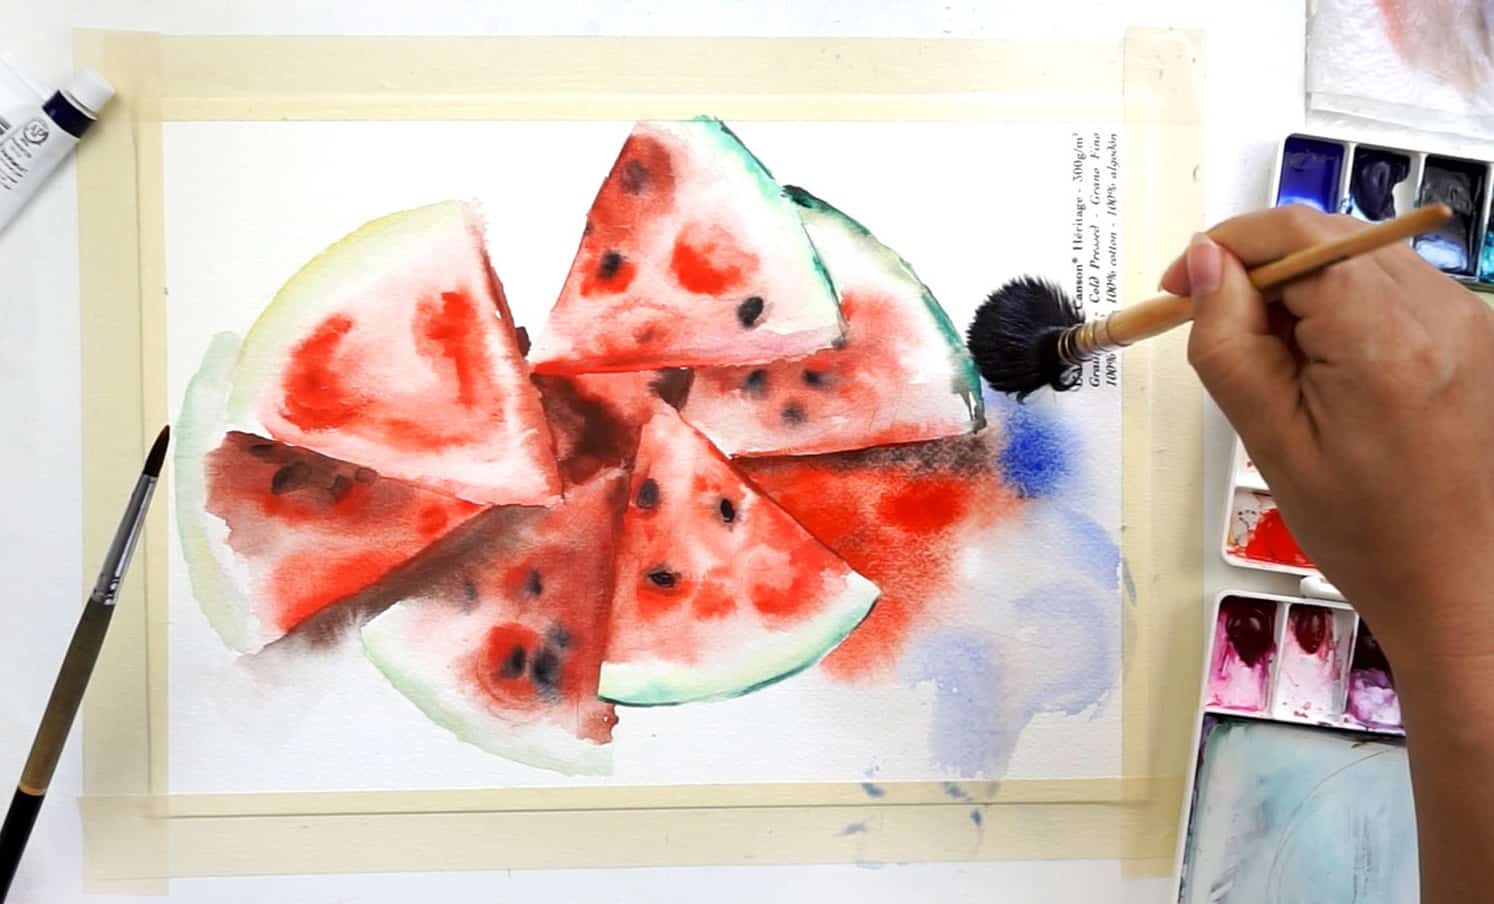
Apply clean water on paper for background first, then paint red slice, let it flow and bleed, and right away paint the background.
I chose blue (Ultramarine Blue) for it.
And while all this mess is wet I quickly lifted some pigment in the area where the ice-cream stick is supposed to be and painted that stick with a light brown color (Raw Sienna).
You might as well skip painting those ice-cream sticks and just leave watermelons as they are.
Step 16
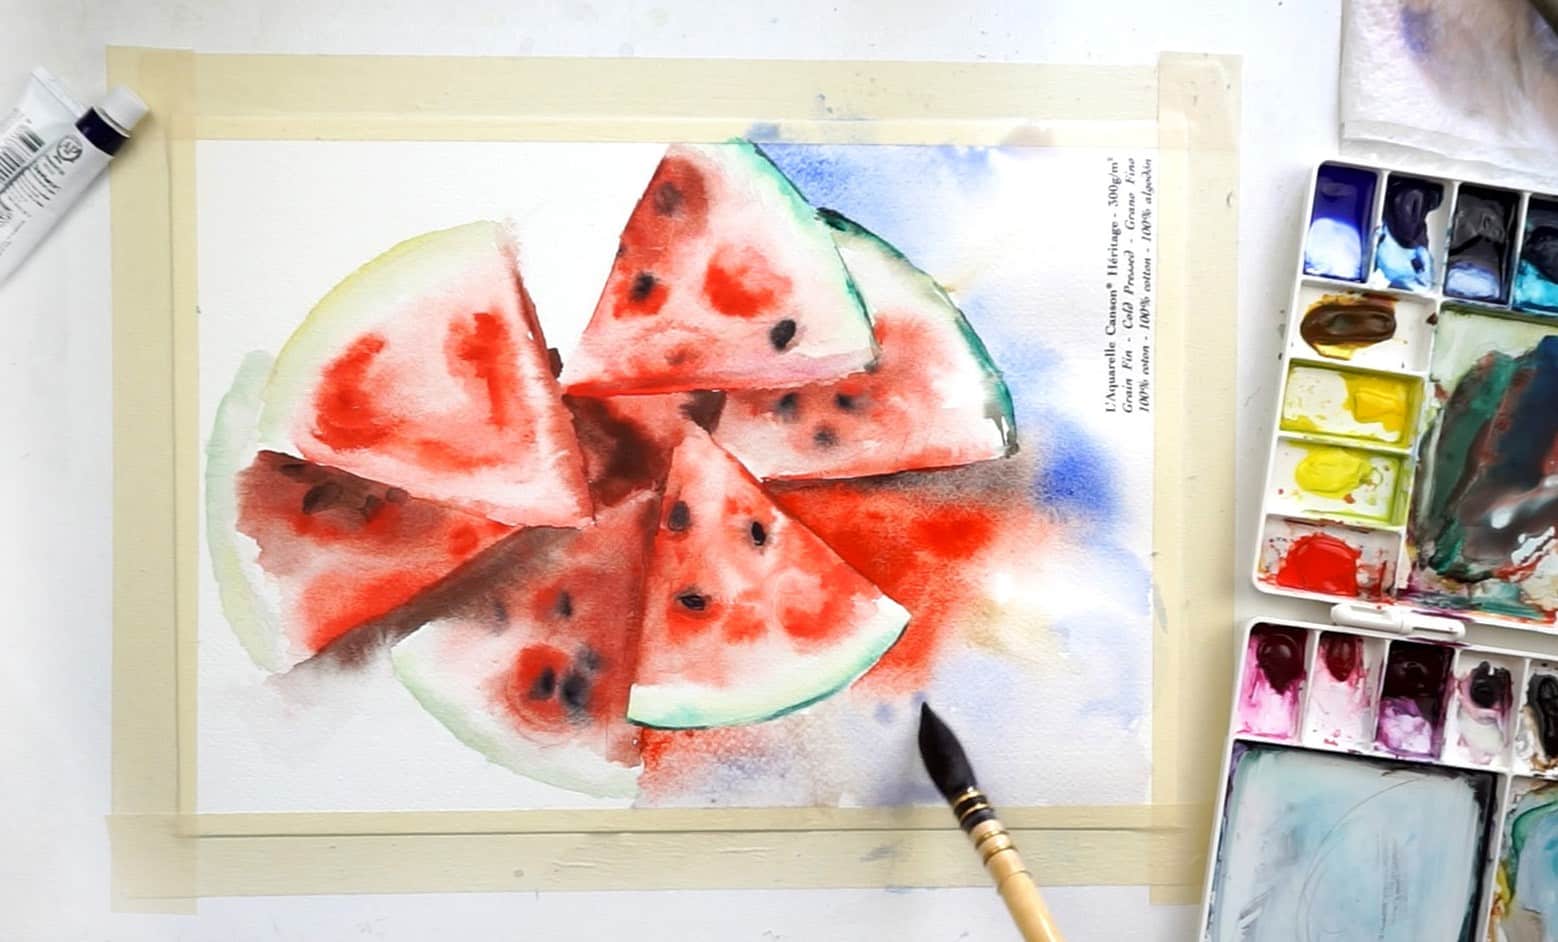
Distribute background blue color with lots of water.
It should flow and lay down the way it wants. Ultramarine Blue is a granulating color so you will see an interesting texture.
Step 17
Add another bottom slice using wet-on-wet technique.
Accuracy here doesn’t matter, just let your paint flow.
When painting seeds, pay attention to the ones that are located on top slices.
The seeds of the bottom slices are more blurry and not in focus.
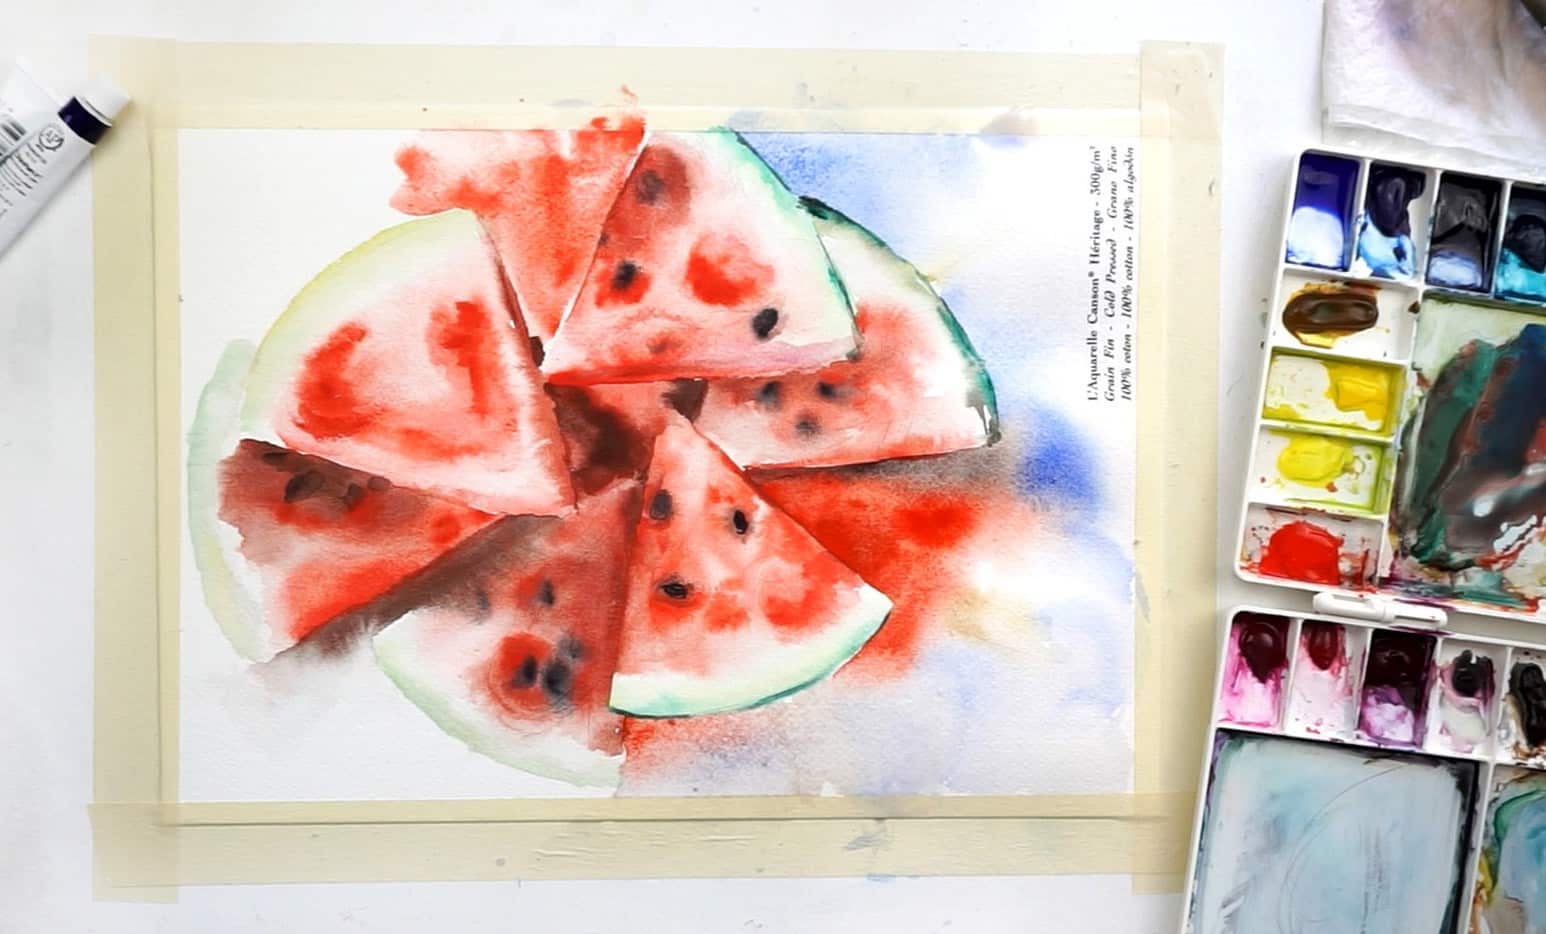
Step 18
Splitting background in two parts is easier to work on, your paper doesn’t get a chance to dry up and you keep working wet-on-wet.
When one side is done move to another side and paint background wet-on-wet.
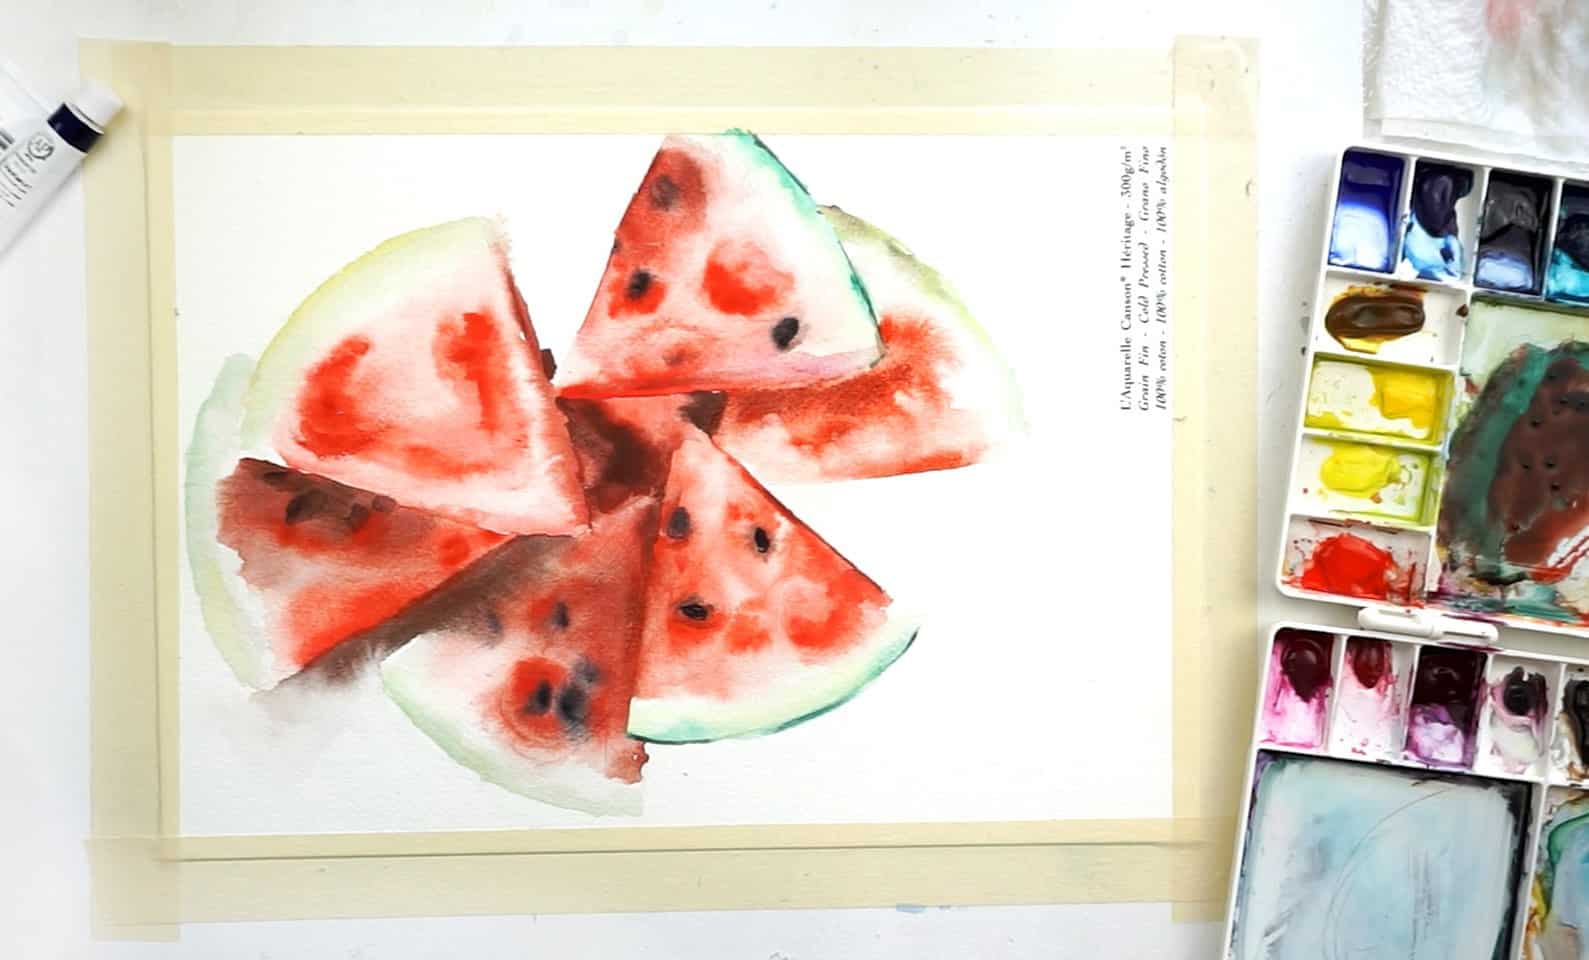
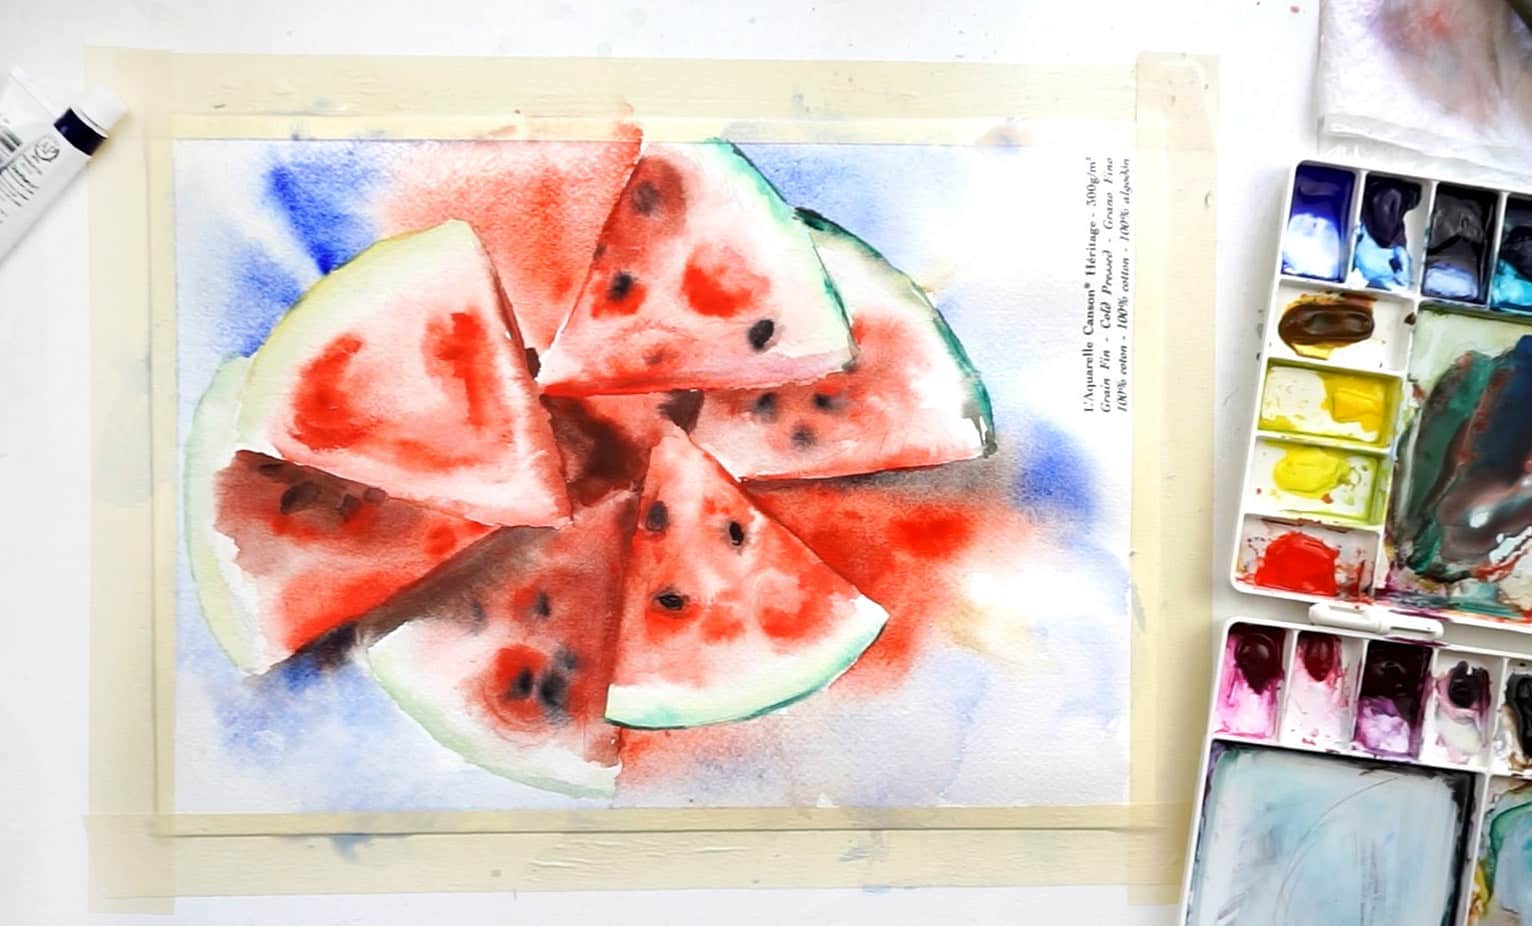
Step 19
Your watercolor watermelons are almost ready, lift the pigment to free up space for ice-cream sticks (if you choose to paint them).
I literally left it blank even without coloring with Raw Sienna to keep the painting airy and light.
Add some final details like balck seeds and boom, you’ve got your watermelons!
To wrap this up!
We would be happy to see your watercolor watermelons, please share your paintings here in comments!
And if you prefer to watch, here is a demo video of the whole process of painting watermelons on our Youtube channel. Feel free to take a look at all our watercolor tutorials here as well.
LIFETIME ACCESS OFFER
Lifetime access to 47 watercolor classes taught by a professional artist.
✅ Full library access, 47 classes
✅ Beginner to Advanced crash course
✅ All our ads-free YouTube videos
✅ Private Facebook group
✅ Real Teacher Feedback
✅ Optional Coaching Sessions